
The Ronnie or Spinner rig has taken the fishing world by storm over the past few years.
Known as “Fishing’s most well known secret” this rig has had huge success, becoming one of the best rigs for catching carp.
Unlike a lot of rigs this one is very flexible and can be used in a variety of different scenarios when fished with a Pop-Up.
If you don’t want to make your own try the Gardner Tackle Ready Tied Ronnie Rigs
Things you will need
- Hook, I like to use a Krank or a Curve Shank hook
- Quick Change Flexi Ring Size 8
- Bait Screw Oval Link, you can use a swivel and bait floss but I find the bait screw is best.
- Heat Shrink
- Hook Beads
I also recommend using a hook sharpening kit on most packet hooks or purchasing hand sharpened hooks as they will convert even more pickups into bites.
If you plan to use sharpened hooks in the water for longer than 24hrs apply a hook grease or use a hook marker and re-sharpen after use.
An easy way to re sharpen is to use the Gardner Tackle Point Doctor.
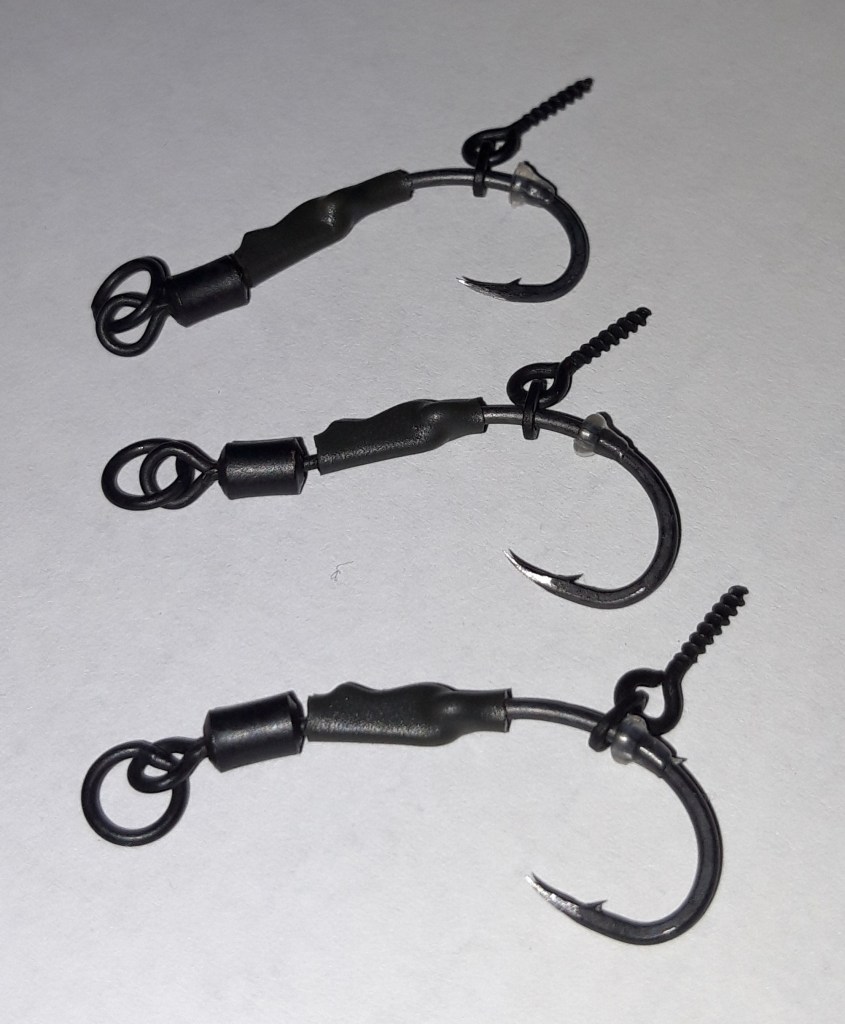
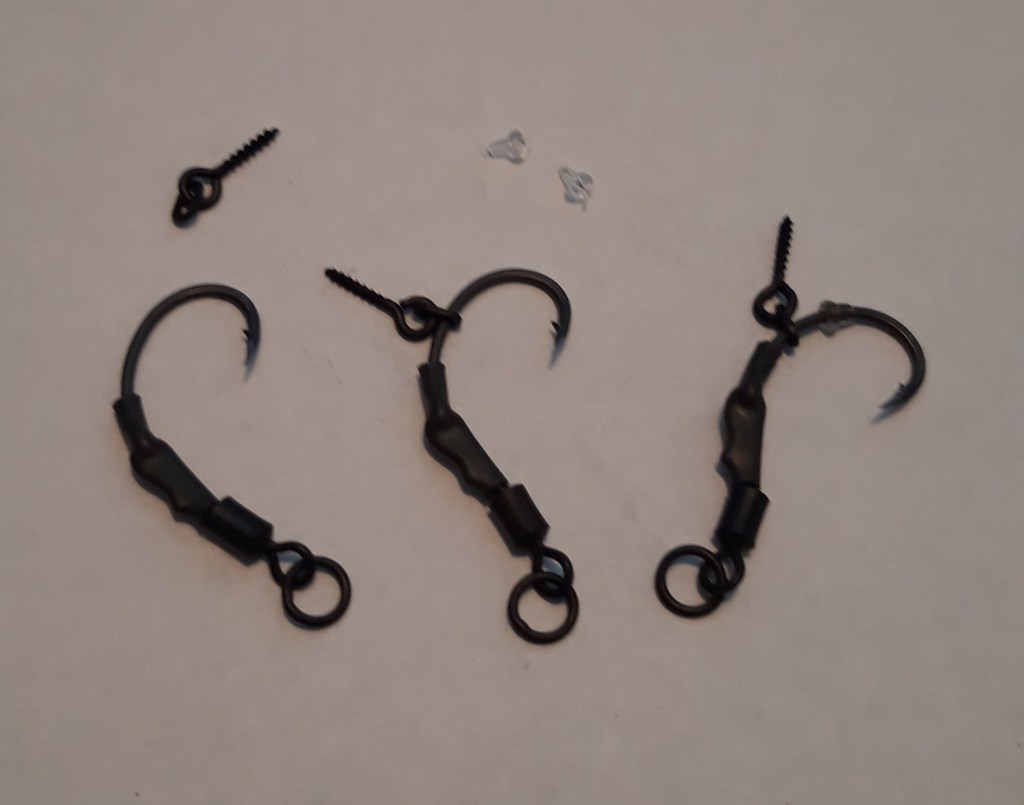
To put these rigs together
- Select your chosen hook – I use the Krank Twister or a super sharp Curve shank in size 6, hand sharpened for brilliant results.
- Next cut 10mm of heat-shrink.
- Thread the heat-shrink onto the hook from the eye end.
- Open up the Quick link enough for a hook to be threaded (from the inside of the eye).
- Close up the eye slightly (don’t worry to much as they will not come off).
- Pull the heat-shrink over the swivel – I like to leave it short of the barrel as it gives it more freedom to move.

- Shrink over a steaming kettle.
- On removing from the kettle make sure the heat-shrink can dry in a slight curve.
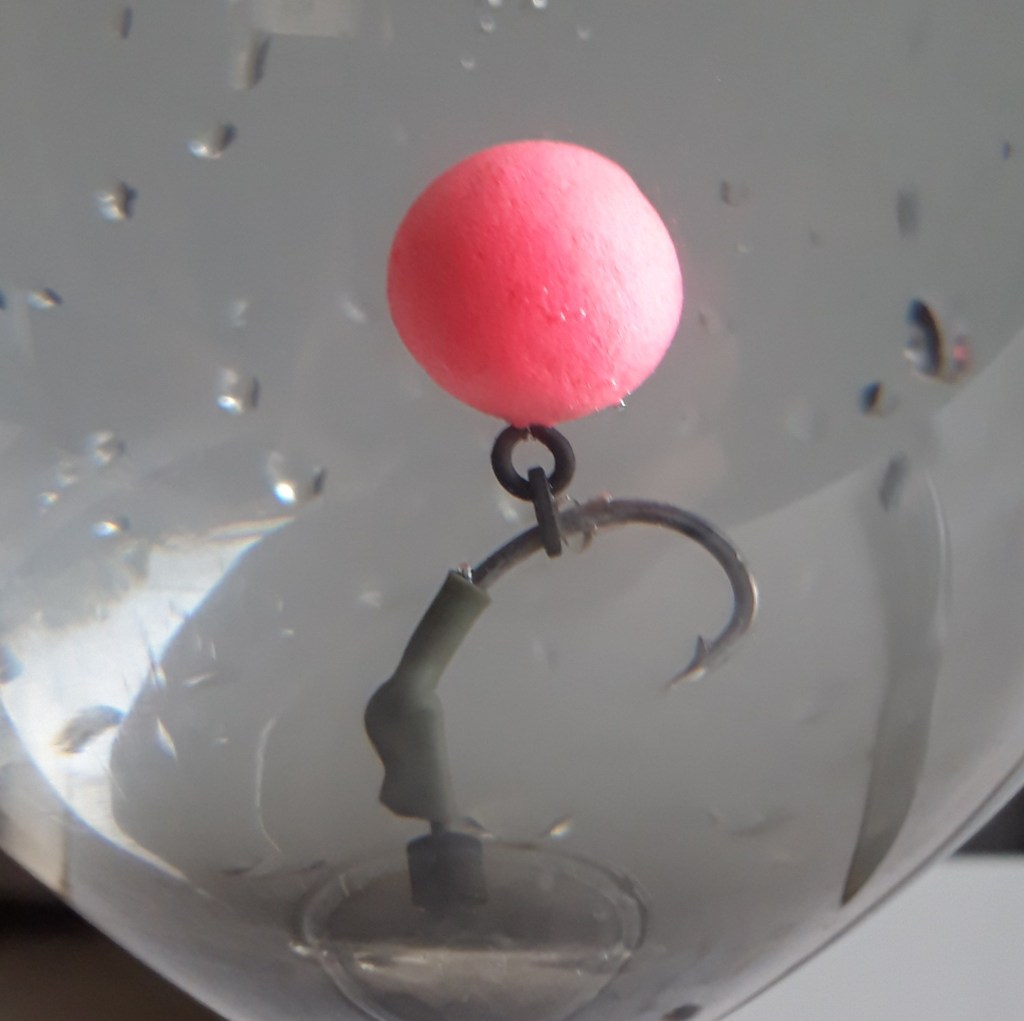
- Thread a bait screw onto the hook.
- Thread the hook bead onto the hook.
The Rig is now complete and ready for any situation.

These rigs are critically balanced with 14mm Mainline Fluoro Pop-Ups, without the need for tungsten putty.
